Advertising a property (Kent Version)
Advertising a property
When advertising a property, you must first check to see whether the property has already been created this is to avoid duplicates being created on the system. Follow the steps described below and search for the property:

If the property shows in the dropdown list, then click on the property and move to the property advert to begin editing it in preparation for advertising:
 You will need to upload a photo for your property advert.
The property cannot be advertised unless a photograph has been uploaded. The photo of the property must be landscape and have a minimum width of 600 pixels. If you not using a photo that an officer has taken and are instead using an image from Google maps there are instructions further down that advise on how to use a google image which is the correct size.
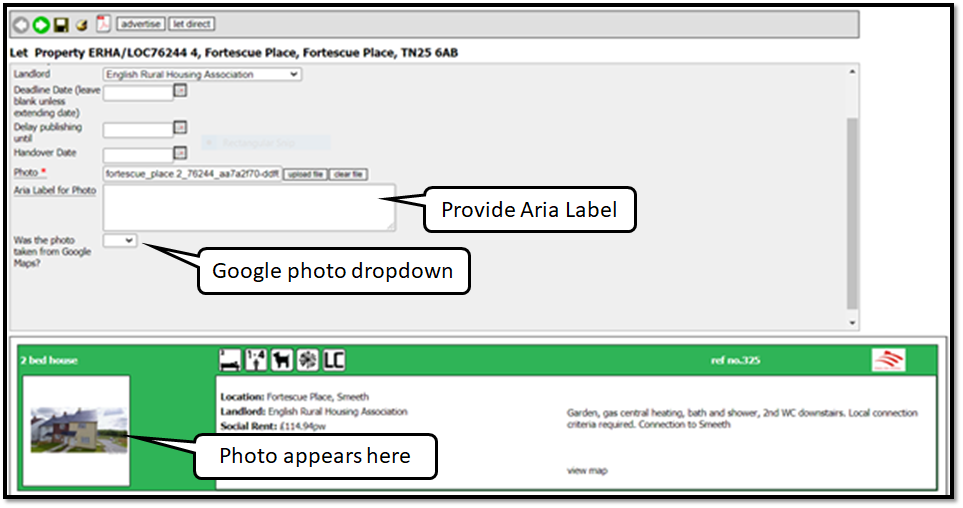
Once your photo has uploaded you will need to add an Aria Label for the Photo as shown above. An Aria Label provides a text alternative for those that cannot see the image for reasons such as sight impairment and so the Aria label would be read to them using screen reader technology.
The Aria Label should therefore be descriptive of the image so for the example above I would say something like:
“an image of three terraced houses, the house on the right end terrace is cream in colour with one window on the ground floor, a white door to the right of the window and there is a path approaching it. There is one window on the first floor in the centre and a black tiled roof. The image shows a road to the right-hand side of this house.”
You will need to say whether the image was taken from google maps. If you select ‘yes’ in this tab, then the photo will automatically be accredited to Google maps when the property is advertised.
You should then work your way through each page tab ensuring that the mandatory fields are completed and as many other fields as possible.
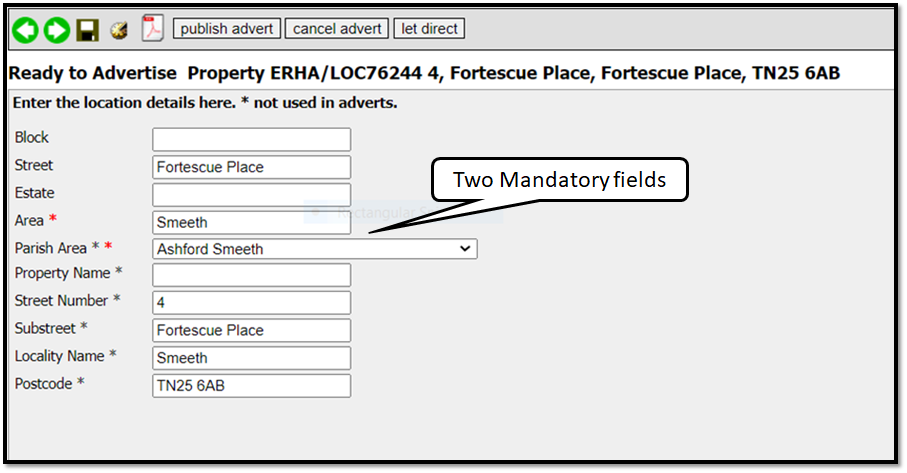
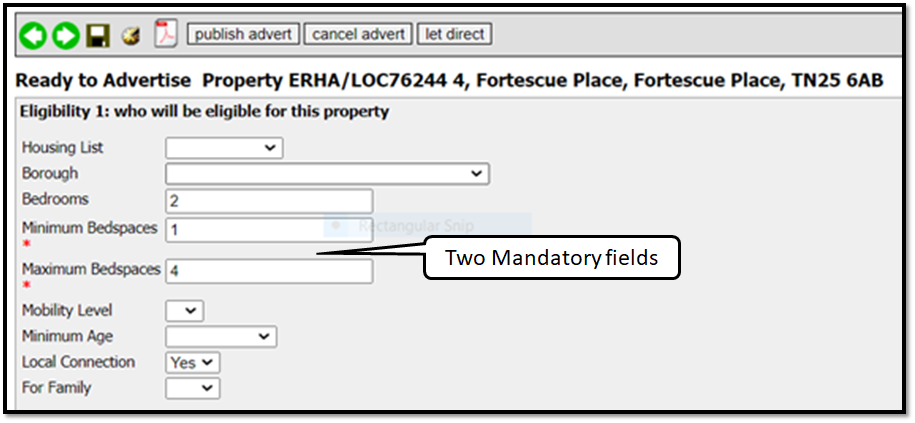
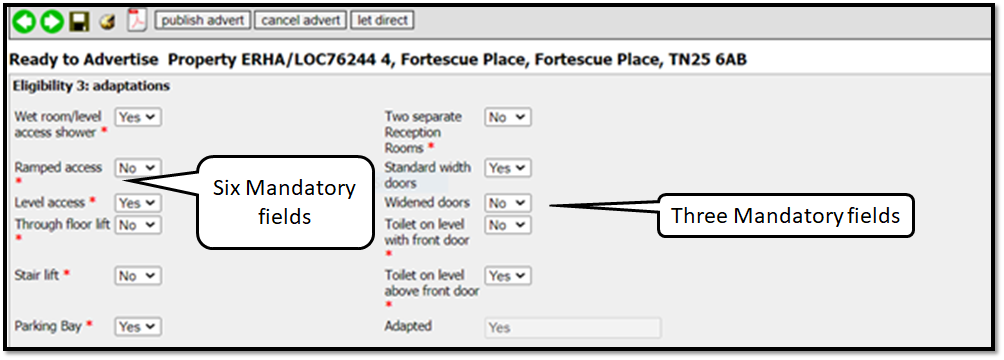
The following images show with red stars the fields that are mandatory.
Location Details:
Eligibility 1:
Eligibility 3:
Describe Property:

There is also an option for adding a virtual video tour of the property to the property advert which can be uploaded where it says, ‘virtual tour html’. You will need to paste the embed code, and where you get this from will be different on each site. E.g. on YouTube, there is a share button beneath the video you have to click that then select the embed option and copy the html into the property wizard. Vimeo and other sites provide guidance on where to obtain the embed code.
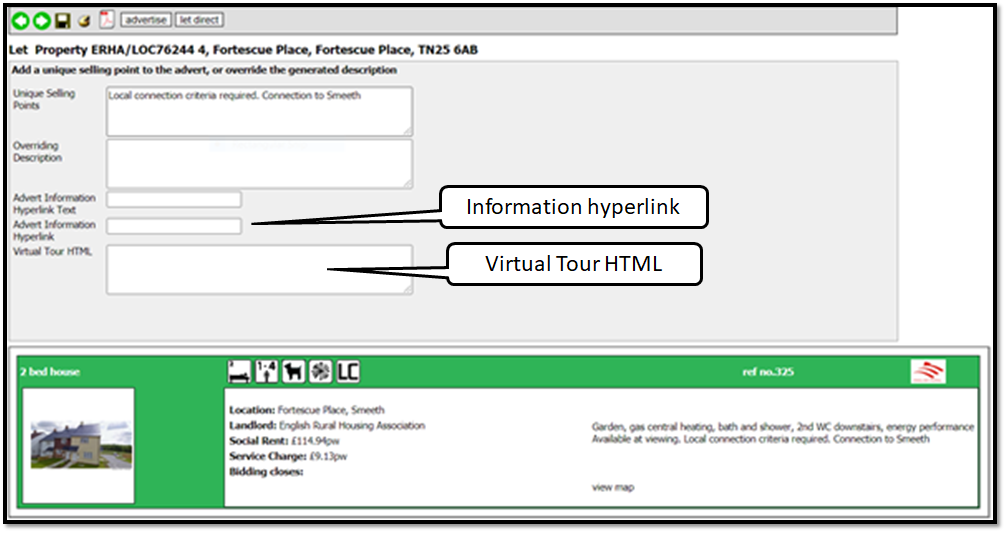
Additional photos can be added at the end and we do encourage you to add these in where they are available it can also be useful to add in floorplans here if you have them. You will also need to add in the aria label here and say whether the image has been taken from google.
Please Note: You will not be able to advertise the property until all of the mandatory fields, including the uploading of the photo have been completed.
Using an image from Google Maps.
To take an image from google maps first of all type in the full address including house number, if and where possible, into the search bar:
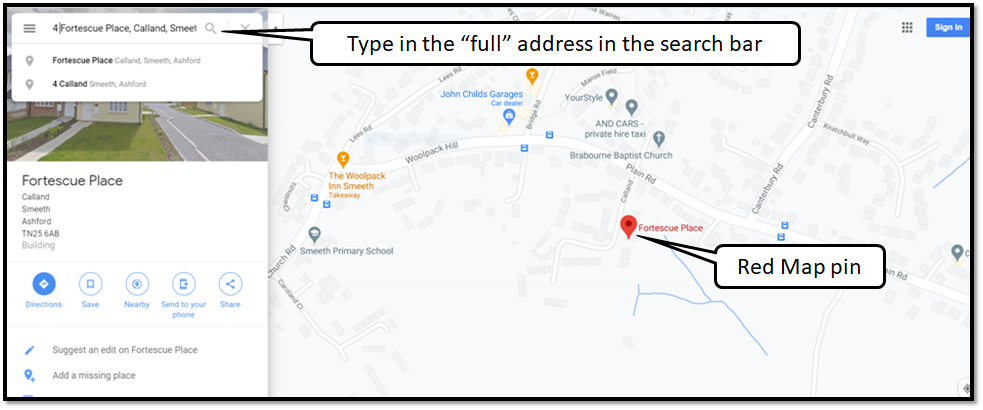
When the map appears click on the yellow man icon and drop the circle that appears underneath it to over the red pinpoint showing you where the address is.
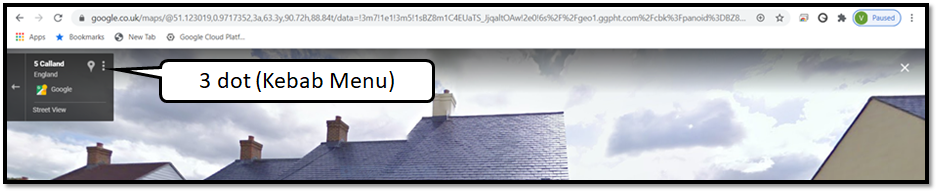
The image should now fill your full window and adjust the image until is displays in a way that would be adequate to use as a photo to advertise the property. When the image is as you would like it to be click on the 3 dots (kebab menu) next to the pause button at the top next to the paused button and you will get a drop down of options:
From that drop down of options please select ‘print’ and you will see that the image appears with an option to save as a pdf. From here you will need to cut the cleaner version of the image and save it to your files ready to use.
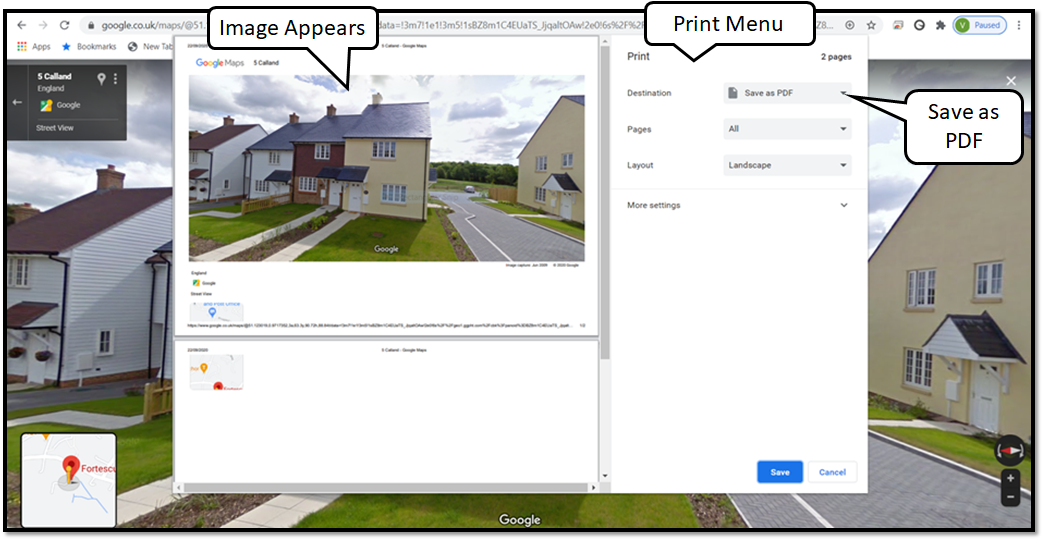
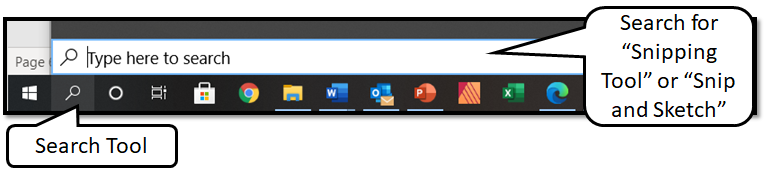
You will need to use your snipping tool or snip and sketch tool which you can find by typing this into your search tool:
You will need to use the tool to highlight all of the google maps image as it displays in the photo box and when you have done that you can select ‘save’ which will allow you to save the image as the name of the property.
The image will then be of the correct size and quality to allow you to upload it to Locata.